Unity UMotion 教學
Unity UMotion 教學
UMotion 是一套支援 Unity 遊戲引擎的動畫編輯器,可直接於 Unity 編輯器製作任何 3D 模型的動畫。支援在 Play 模式下調整動畫以減少開發時間。
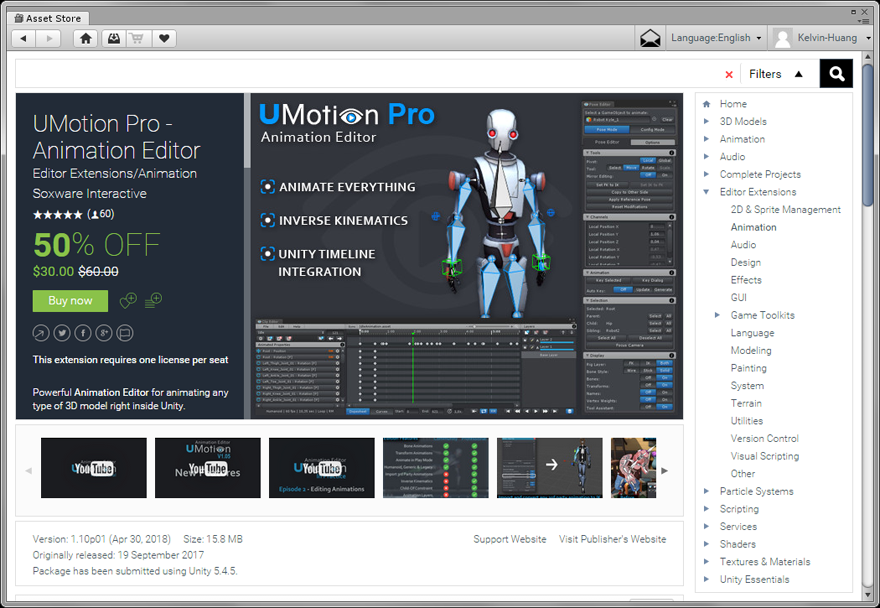
UMotion COMMUNITY 免費版功能
Muscle Groups 快速編輯上半身、下半身、手部姿勢與動畫
Weighted Tangents 動畫切線權重調整
Bone/Transform Animations 骨架與變形動畫
Animate GameObject Components
Animate in Play Mode
支援 Humanoid, Generic, Legacy 動畫類型
支援 Root Motion
Animation Events 動畫事件
UMotion Pro 專業版功能
支援匯出 FBX 檔
…. use animations created in UMotion in 3D modeling applications.
整合 Unity Timeline 時間軸動畫
…. edit animation clips used in Unity Timeline.
支援動作捕捉與 3rd Party 協力廠商動畫
…. from the Asset Store or any modeling application.
Animation Layers
… use additive/override layers to modify animations without touching existing keys.
支援 Inverse Kinematics 逆向運動
… advanced IK solution with IK Pinning and FK/IK Blending.
Child-Of Constraint
… change parenting during an animation.
動畫轉換為 IK 逆向運動
… edit existing animations as if they have been created using your IK setup.
LEARNING MATERIAL
Learning UMotion is easy thanks to the detailed HTML based manual that is kept in the same style as Unity’s.
The high quality video tutorials are organized into small chapters and are coming straight to the point:
UMotion General – Video Tutorials
UMotion Professional – Video Tutorials
UMotion “In Practice” – Video Tutorials
Please note that animating is a creative process that will require some practice in order to create good results.
本教學先以免費的 UMotion Community 版本講解。
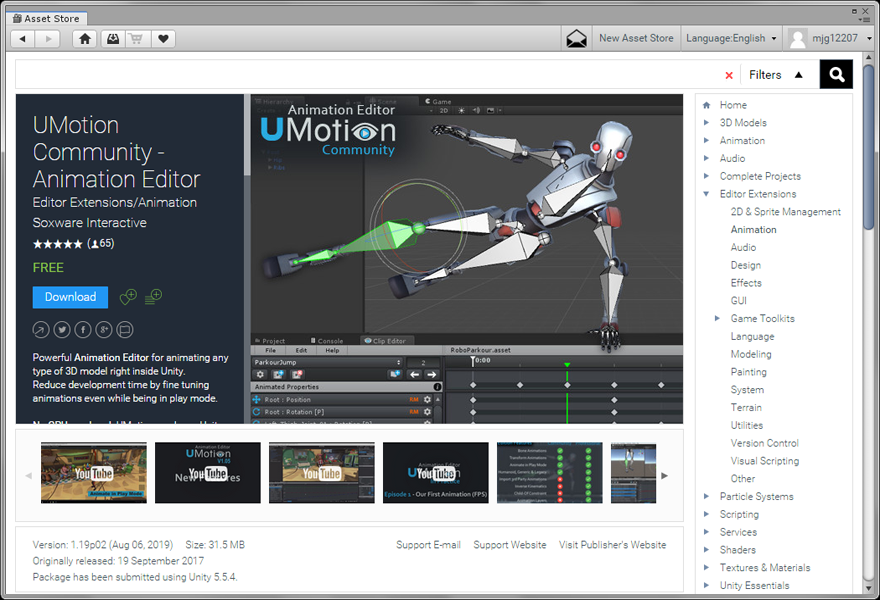
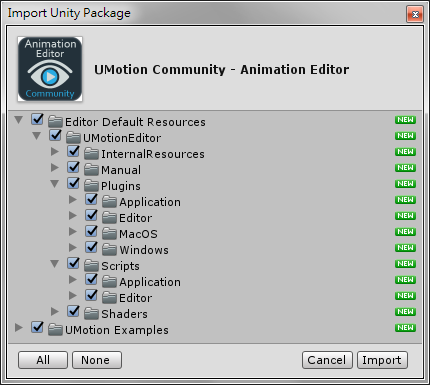
將 UMotion 下載並匯入 Unity 專案。
 ~430
~430
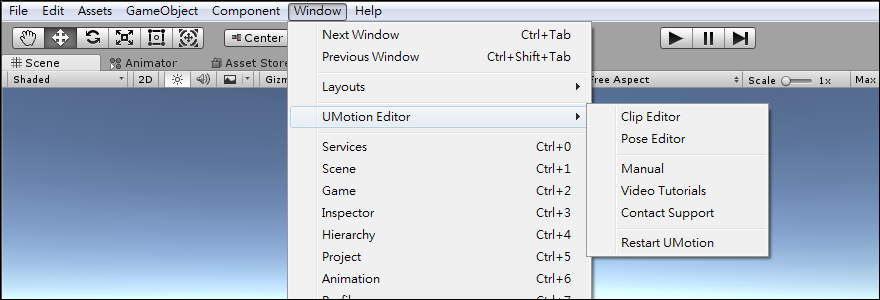
執行 [ Window > UMotion > Editor > Clip Editor ] 開啟 UMotion 動畫編輯器。
UMotion Clip Editor 擁有 Animation 動畫編輯器的相同功能,但更為強大。
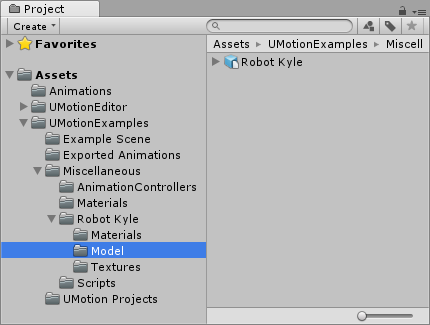
使用資源包收錄的 Robot Kyle 機器人角色練習,您也可以從 Asset Store 自行匯入使用,將動畫類型改為 Humanoid 。
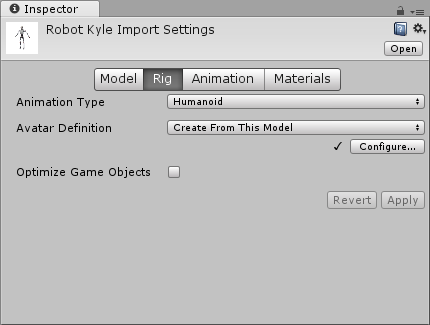
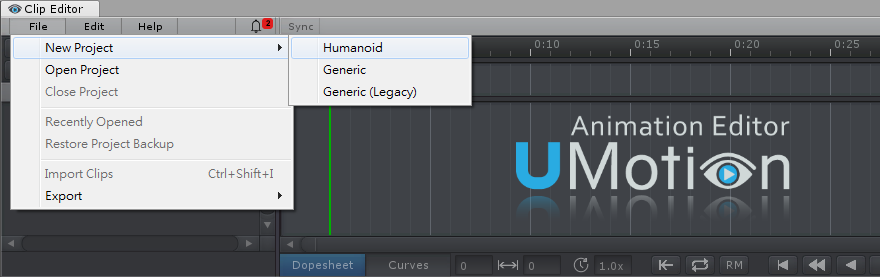
Clip Editor 執行 [ New Project > Humanoid ] 建立動畫專案檔,注意!略過此步驟將導致無法進行後續的動畫編輯。
將拖曳到 Select a GameObject to animate 欄位。
出現 UMotion – New Rig Detected 訊息,按下 Create Configuration 按鈕建立組態設定。

執行 [ Window >UMotion Editor > Clip Editor ] 與 [ Window >UMotion Editor > Pose Editor ] 開啟Clip Editor 與 Pose Editor 視窗。
開啟後,可以移動視窗。
選擇Ciip Editor 面板,執行 File >NewProject> Humanoid 建立一個人形骨架的UMotion專案。
目前儲存於 Assets 底下,但是為了方便管理,建議開啟一個UMotion資料夾來擺放。
將場景上的 Robot Kyle 拖曳到 Pose Editor 中的 Select a GameObject to Animate 欄位中。
此時UMotion會自動綁定骨架,點擊 Create Configuration 確認。
完成後,角色會顯示骨架,並且在Ciip Editor 面板中,也會顯示角色的骨架。
可以在操作前,可以先看一下Pose Editor 的Tools有哪些功能:
Pivot:可以設定骨架的軸心要以自身座標,或是世界座標來進行操作。
Tool:如同 Unity 的「選擇」、「移動」、「旋轉」、「縮放」的功能。
Mirror Editing:選擇是否鏡像調整。
可以試著在 Scene 場景中,對著目前的角色進行姿勢的編輯。
附註:如果要對角色的「整體」的位置、旋轉進行編輯,需要選擇「骨盆」骨架才可以。
Shift + 點擊骨架:選取點擊的關節的所有下階骨架。
Ctrl + 點擊骨架:可以選取複數骨架。
如果編輯完成後,不希望看到骨架,可以看到 Pose Editor 頁面中的 Display 欄位,將 Bones 關閉即可。
在 Options 分頁中,可以設定骨架的顏色、大小。
在 Scene 視窗,會看到 Muscle Groups 小視窗,這可以幫助我們快速調整姿勢,Muscle Groups 有分「上半身」、「下半身」與「手掌」的部分,可以快速調整需要的姿勢。
要將目前的姿勢錄製成關鍵影格,可以先按下 Ctrl + A 或 Pose Editor 頁面中的 Selection 項目下的 Select All 按鈕,可以全選目前所有的骨架。
接著再確認 Clip Editor 中的影格是不是需要的位置。
確認完畢後,按下Pose Editor 頁面中的Animation 項目下的 Key Selected> Key All按鈕,錄製關鍵影格。
接著就繼續錄製之後的動作,如果需要自動錄製動畫,可以在 Pose Editor 頁面中的 Animation 項目下的 Auto Key ,可以設置是否自動錄製關鍵影格。
如果要複製某一段的關鍵影格,可以在對要複製的關鍵影格點擊右鍵> Copy ,再到需要的秒數點擊右鍵> Paste 即可。
如果要預覽目前的結果,可以按下 Clip Editor 下的播放鈕,如果要播放特定秒數的動畫,可以調整播放秒數(如紅圈),或是調整關鍵影格中上方的白色小三角型(紅框範圍)。
動畫完成了,現在要輸出成amin檔,先在 Clip Editor 頁面的左上角,按下「齒輪」按鈕,開啟 Settings 頁面。
接著修改 Destination Folder 動畫檔儲存的位置。
再點擊 Clip 分頁,更改 Name 檔案名稱後,按下Close關閉視窗。
再執行 Clip Editor 分頁中的 File > Export > Current Clip 按鈕,將目前的UMotion檔案存為動畫檔。
儲存中會出現 Exporting 的視窗,等待輸出完畢後點擊 OK 按鈕。
在指定的資料夾中就可以看到輸出完成的動畫。
如果要退出目前的角色編輯狀態,可以按下 Pose Editor 中的 Select a GameObject to animate 欄位右邊 Clear 按鈕。
接著可以嘗試匯入別的角色來進行編輯,此處使用 Unity 內建的Ethan角色。
但是在放入 Pose Editor 中卻出現提示訊息,因為在同一個UMotion專案中不能夠有多個角色,必須要再建立一個UMotion專案。
需要再度選擇Ciip Editor 面板,執行 File >NewProject> Humanoid 再建立一個UMotion專案。